EtherCAT Slave
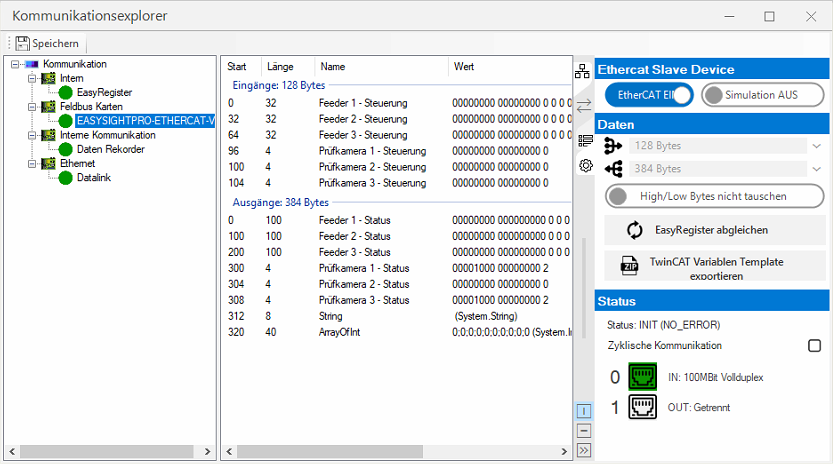
The communication parameters are adjusted in the communication explorer.
Settings
| Ethercat | Activates/deactivates communication. |
| Simulation | Activates/deactivates the simulation of the card. This is helpful if no card is installed in the system. |

|
Number of input data of the device in bytes. |

|
Number of output data of the device in bytes. |
| Swap High/Low Bytes | This option is deactivated by default with Ethercat and should only be changed in special cases. |

|
Synchronises the name and data type for all register transfer modules in the EasyRegister. |

|
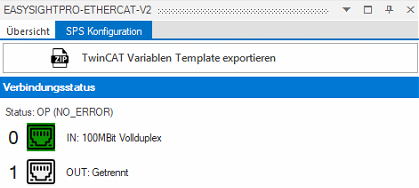
Exports the current fieldbus configuration as a TwinCAT variable template. |
| Status | Current status of the EtherCAT device. |
| Cyclical communication | Indicates whether cyclical communication with the control unit is active. This is the case if the device is in OP status. |
Operation
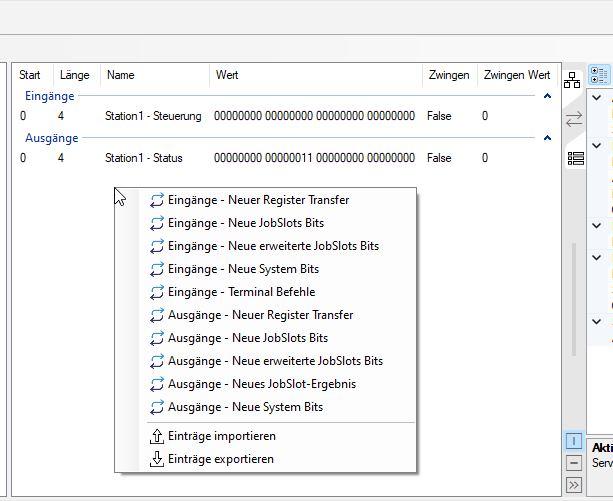
In the centre section of the communication explorer, you can now right-click to add individual fieldbus blocks or edit or delete existing ones.
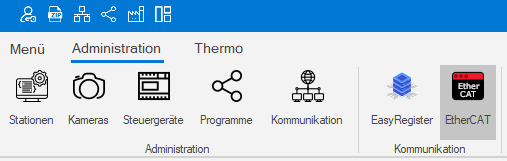
You can access the monitoring and status check via the Administration menu.
The status and values of the inputs and outputs of the EtherCAT communication can be monitored here.

PLC integration
The latest ESI file is located
-
on the controller under: %ESP_ROOT%\Fieldbus\EtherCAT\Hilscher CIFX RE ECS V4.6.X.xml
-
hiere as download
Important: The version in the file name indicates the ESI data version and may change without notice.
-
Shoot TwinCAT.
-
Delete the ESI file "OnlineDescriptionCache00000DA6.xml" automatically generated by TwinCAT in the ESI directory (e.g. C:\TwinCAT\3.1\Config\Io\EtherCAT)
-
Copy the ESI file to the ESI directory (e.g.: C:\TwinCAT\3.1\Config\Io\EtherCAT)
-
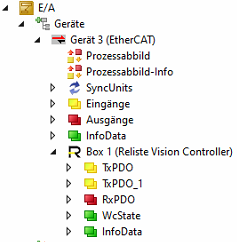
The device appears after the search in the TwinCAT System Manager as "Box 1 (Reliste Vision Controller)"
-
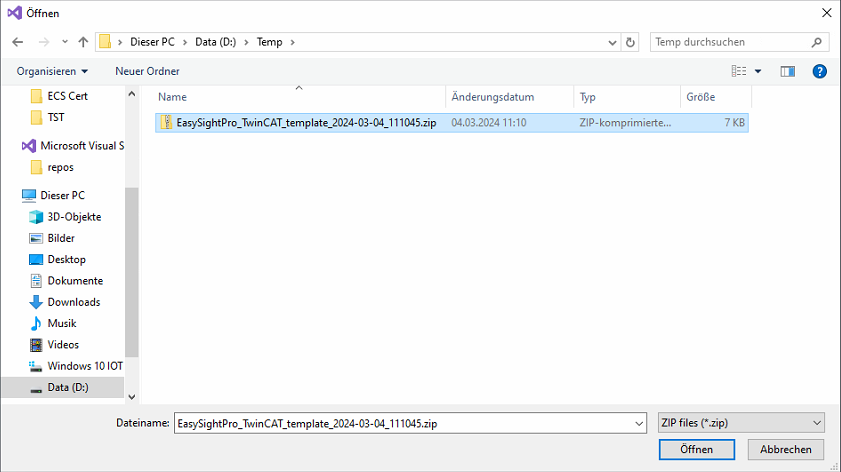
The data structure of the EasySightPro® configuration can be saved as a ZIP file in the communication explorer using "Export TwinCAT variable template"
-
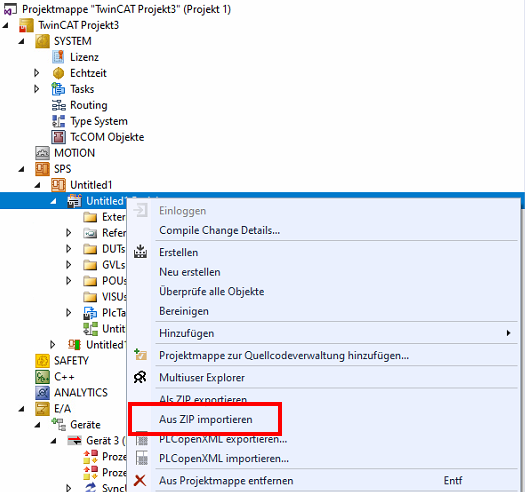
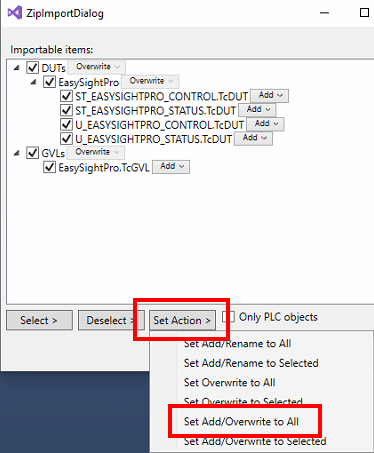
The generated ZIP file can be read into TwinCAT using "Import from ZIP"
-
If an imported structure already exists, you should select "Set Add/Overwrite to All". Confirm import with "OK"
-
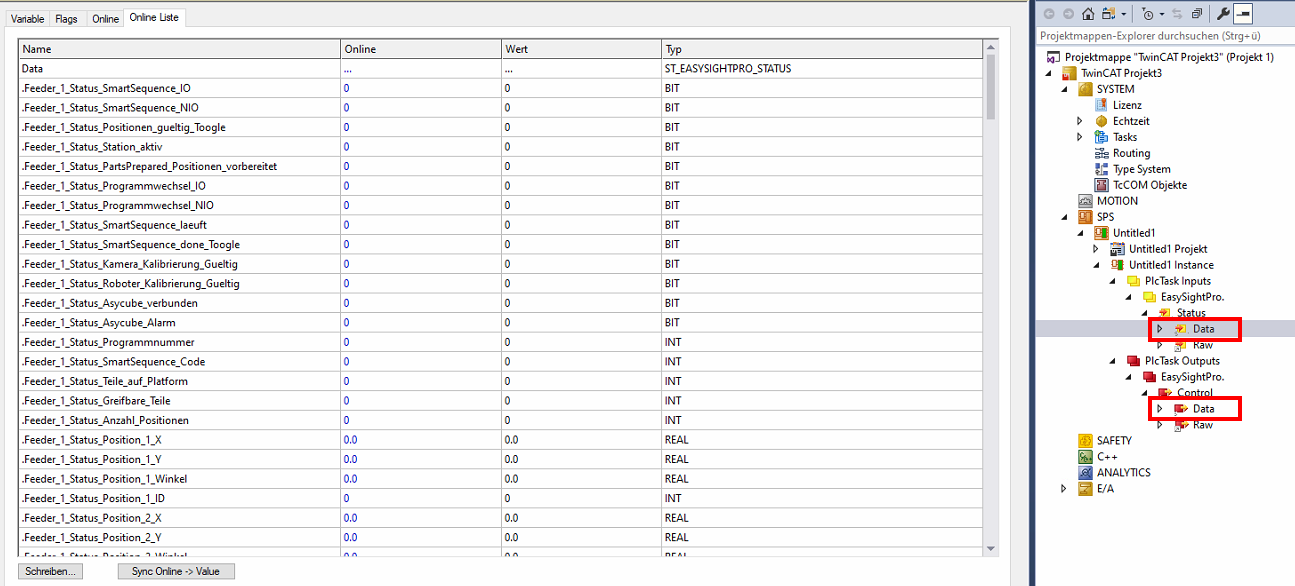
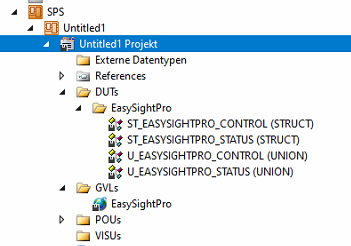
After the import, an EasySightPro global variable (GVLs) and the associated data structures are created under DUTs\EasySightPro
-
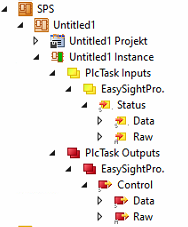
Compile project, this creates the instances
-
Now the raw data of the data structure must be connected to the device
-
PlcTasks Inputs - EasySightPro. - Status - Select Raw and click on "Change link" with the right mouse button

-
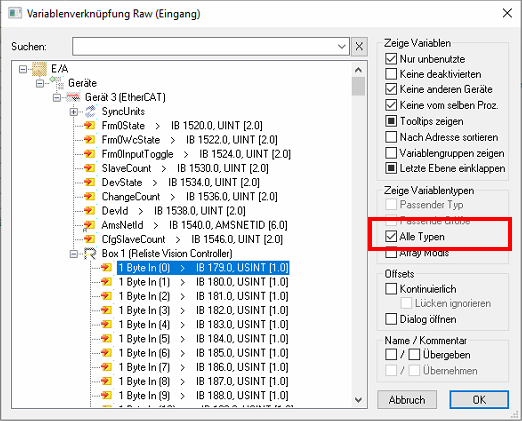
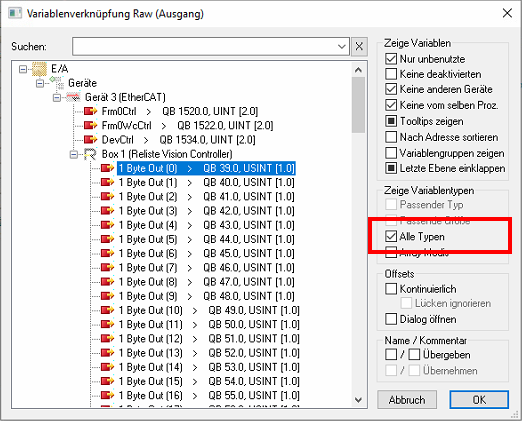
In the window, first switch to "All types" under "Show variable types". The Vision Controller then becomes visible
-
Now select "1 byte IN[0]" and select the data range up to "1 byte In [383]" by holding down the SHIFT keys
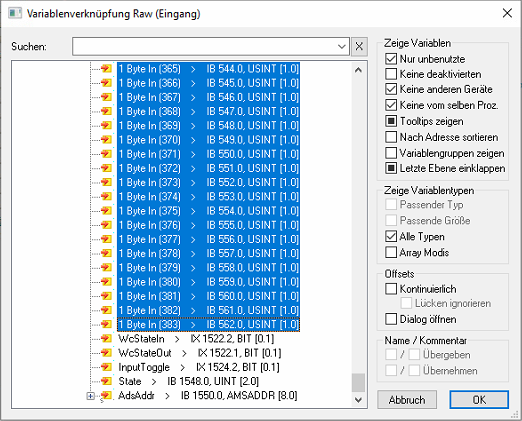
-
As a final step, set the offset to Continuous and confirm with OK
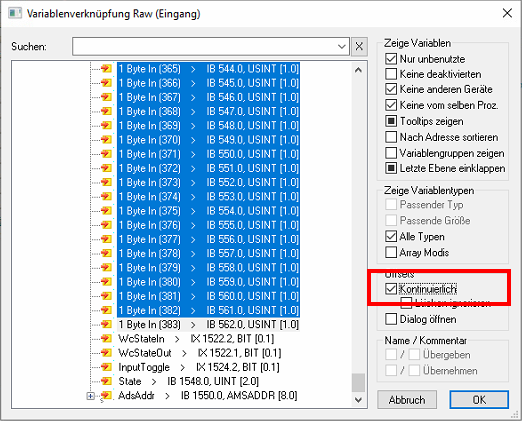
-
The Plc inputs are now connected
-
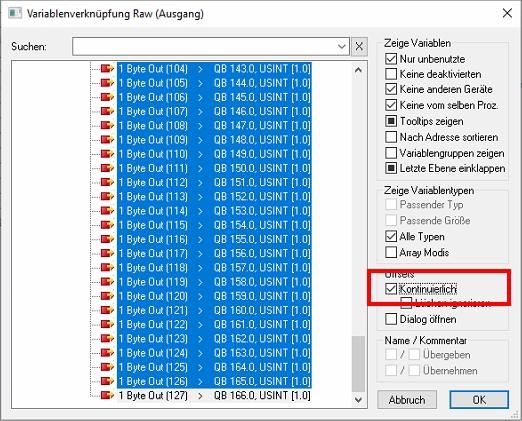
PlcTasks Outputs - EasySightPro. - Status - Select Raw and click on "Change link" with the right mouse button

-
In the window, first switch to "All types" under "Show variable types". The Vision Controller then becomes visible
-
Now select "1 byte out [0]" and select the data range up to "1 byte out [127]" by holding down the SHIFT keys
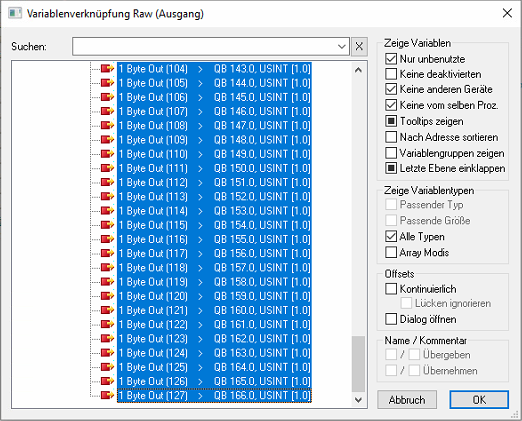
-
As a final step, set the offset to Continuous and confirm with OK
-
The PLC outputs are now connected
-
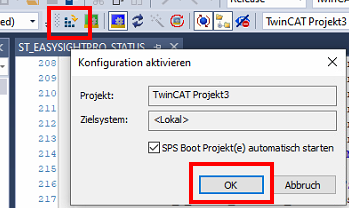
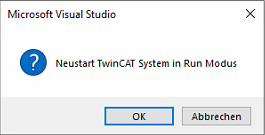
The configuration can now be activated and TwinCAT can be switched to Run mode
-
The online data can be viewed via EasySightPro.Status.Data or EasySightPro.Control.Data