Profinet IO-Device
The communication parameters are adjusted in the communication explorer.

Settings
| Profinet | Activates/deactivates communication. |
| Simulation | Activates/deactivates the simulation of the card. This is helpful if no card is installed in the system. |

|
Name of the Profinet device. This can be assigned via the Tia portal. |

|
Saved IP address of the device. This can be assigned via the Tia portal. |

|
Saved subnet mask of the device. This can be assigned via the Tia portal. |

|
Saved gateway address of the device. This can be assigned via the Tia portal. |
Information: The saved network settings do not have to correspond to the current settings. If management is carried out by TIA Portal, only temporary settings are usually assigned and 0.0.0.0 is displayed.

|
Number of projected input data in bytes. |

|
Number of projected output data in bytes. |
| Swap High/Low Bytes | This option is active by default with Profinet and should only be changed in special cases. |

|
Synchronises the name and data type for all register transfer modules in the EasyRegister. |

|
Exports the current fieldbus configuration as Excel for import into Tia Portal variable tables. |

|
Restarts the module and reinitialises the Profinet device. |
| Cyclical communication | Indicates whether cyclical communication with the PLCt is active. |
| Diagnostics module |
The module diagnostics shows the status of the individual sub-modules. This is helpful for hardware configuration in Tia Portal. |
Operation
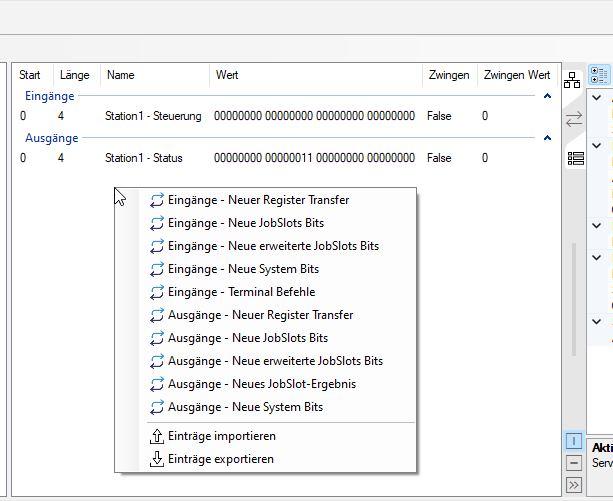
In the centre section of the communication explorer, you can now right-click to add individual fieldbus blocks or edit or delete existing ones.
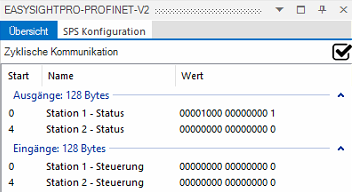
You can access the monitoring and status check via the Administration menu.

The status and values of the inputs and outputs of the PROFINET communication can be monitored here.
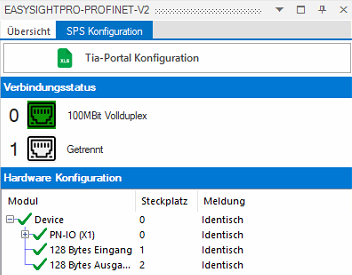
Important: The hardware configuration shows whether the project planning in Tia Portal corresponds to EasySightPro®. If a faulty module is displayed, the configuration in Tia Portal must be corrected.
PLC integration
The latest GSD file is located
-
on the controller under: %ESP_ROOT%\Fieldbus\PROFINET\GSDML-V2.43-RELISTE-EASYSIGHTPRO-20231218.xml
-
here as download
-
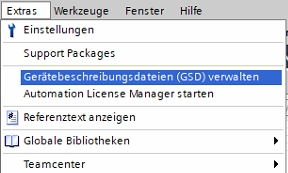
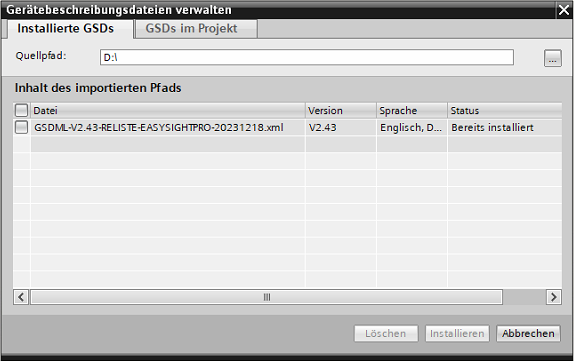
Open Tia Portal project and install GSD file
-
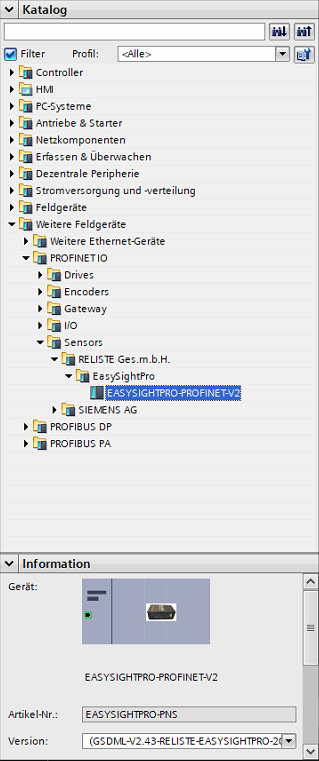
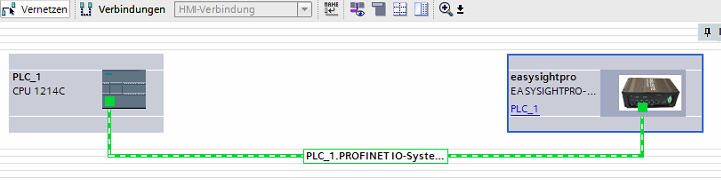
Inserting and configuring the fieldbus card in TIA Portal:
In the catalogue: Further field devices - PROFINET IO - Sensors - RELISTE Ges.m.b.H. - EASYSIGHTPRO-PROFINET-V2
-
Select interface:
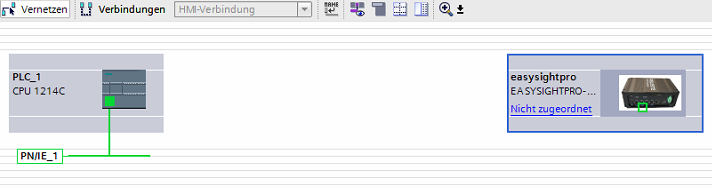
-
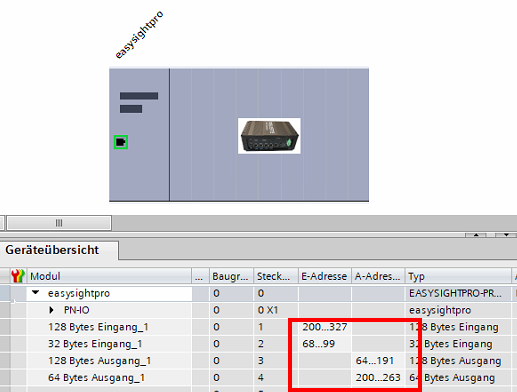
Configure input and output modules according to the EasySightPro® communication module:
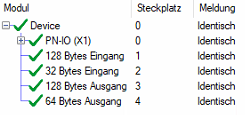
Information: The correct sequence must be observed here. First all inputs and then all outputs.
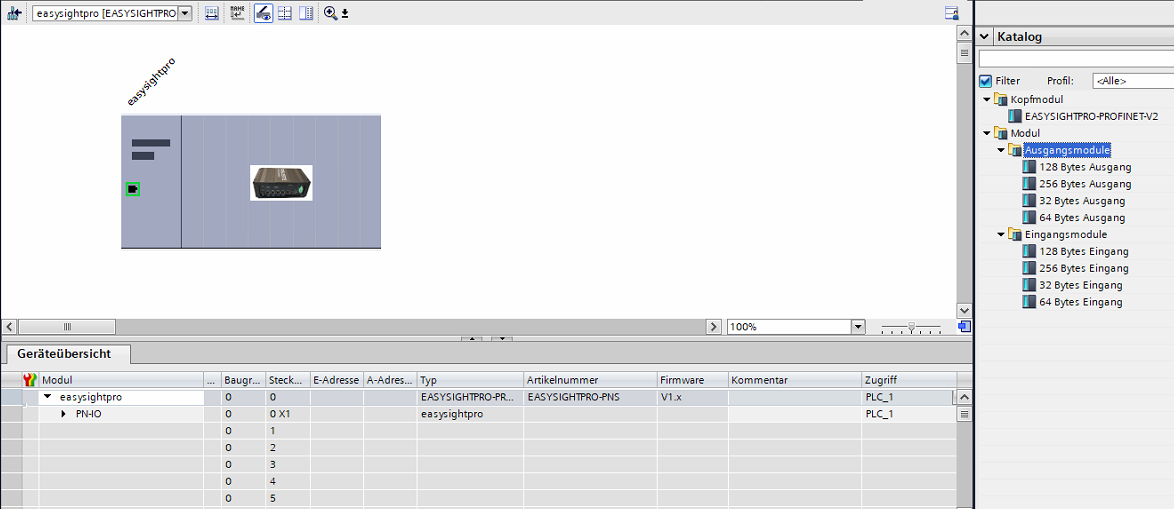
-
Set IP address:
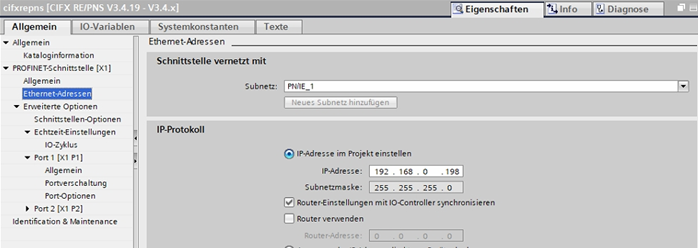
-
Enter PROFINET device name (default is "easysightpro"):
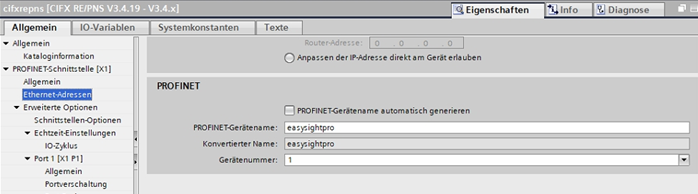
Information: According to the PROFINET specification, the device name may only contain lower-case letters, numbers and hyphens (-). However, it is recommended that hyphens are also omitted.
-
Compile project and load into PLC.
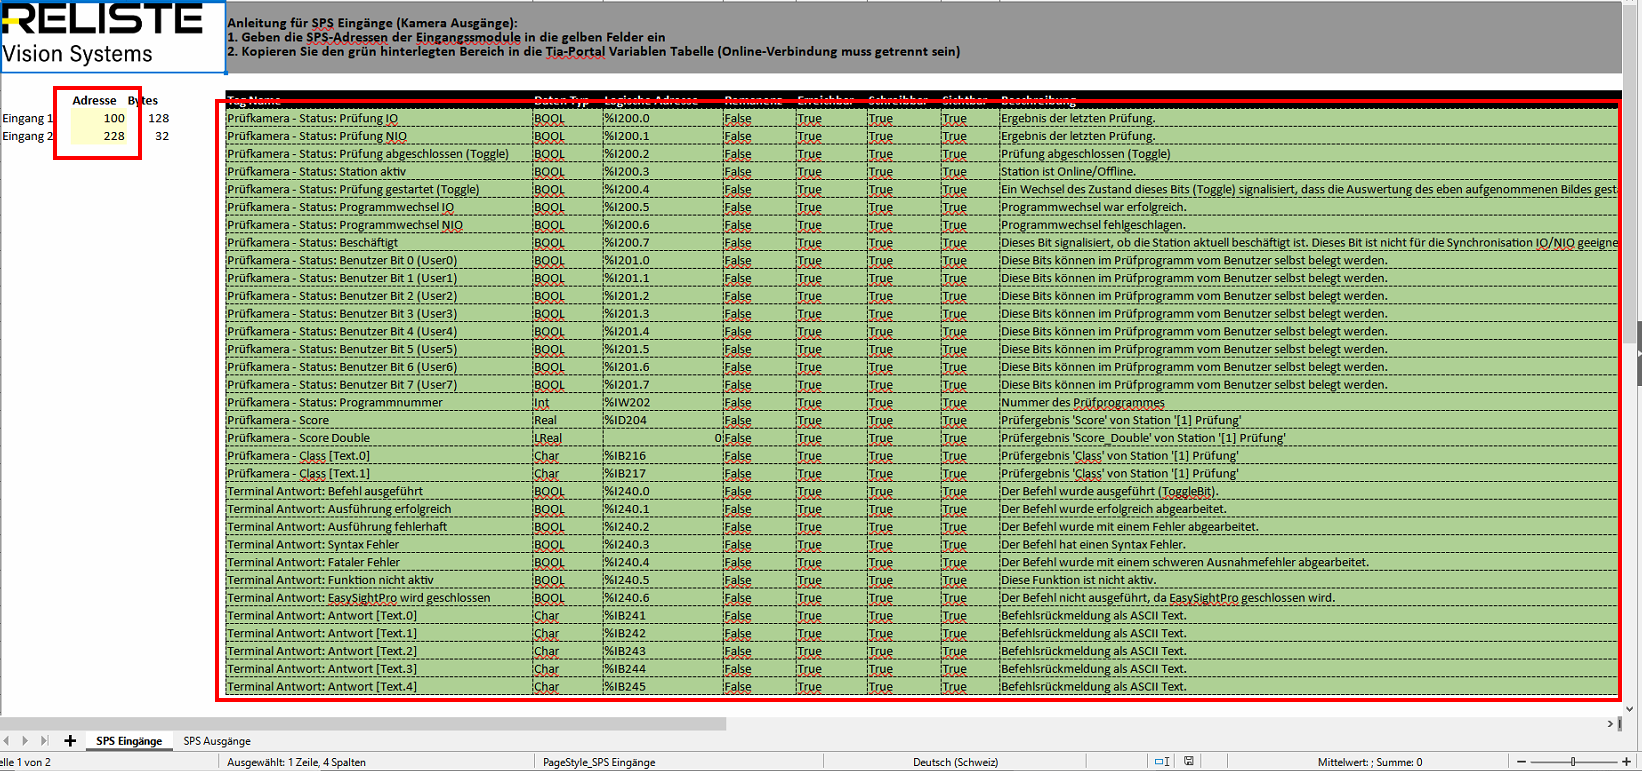
The assignment of all communication modules can be exported as an Excel list:
-
Export configuration as Excel
-
The Excel list has two tabs 'PLC inputs' and 'PLC outputs'
-
Enter the addresses of the modules from Tia Portal in the fields highlighted in yellow in Excel.
-
Copy the entire area highlighted in green into a Tia Portal variables table.
Important: The online connection must be disconnected in Tia Portal for this purpose!