TwinCAT Ads
The communication parameters are adjusted in the Communication Explorer.
To do this, select the corresponding fieldbus card on the left so that you can then make the appropriate settings in the right-hand section of the Communication Explorer.
Information: TwinCAT must be installed and configured on the controller..

Settings
| TwinCAT Ads | Enables/disables communication. |
| Simulation | Enables/disables simulation. This is useful if TwinCAT is installed. |

|
AMS Net ID of the server (PLC). Default for local access: 127.0.0.1.1.1 |

|
Communication port according to TwinCAT Ads configuration. |

|
Variable name with the output data of the PLC (camera inputs). If a TwinCAT Ads connection is active, all variables of the type “ARRAY[0..] OF BYTE” are displayed in the selection. |

|
Size of the input data of the variable in bytes. |

|
Variable name with the input data of the PLC (camera outputs). If a TwinCAT Ads connection is active, all variables of the type “ARRAY[0..] OF BYTE” are displayed in the selection.. |
|
|
Size of the output data of the variable in bytes. |
| Swap high/low bytes | This option is disabled by default and should only be changed in special cases. |

|
Synchronizes all register transfer module names and data types in EasyRegister. |

|
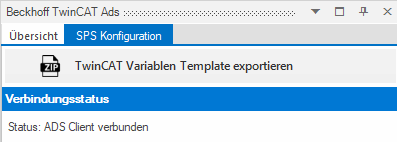
Exports the current fieldbus configuration as a TwinCAT variable template. |
| Status | Current status of the software connection from the TwinCAT Ads Client. |
| Cyclical communication | Indicates whether cyclic communication with the controller is active. This is the case when access to the input and output variables in the PLC is working. |
| Input variable available | Indicates whether access to the PLC input variable is working. If this does not work, either the PLC is not accessible or the variable name is configured incorrectly. |
| Output variable available | Indicates whether access to the PLC output variable is working. If this does not work, either the PLC is not accessible or the variable name is configured incorrectly. |
Operation
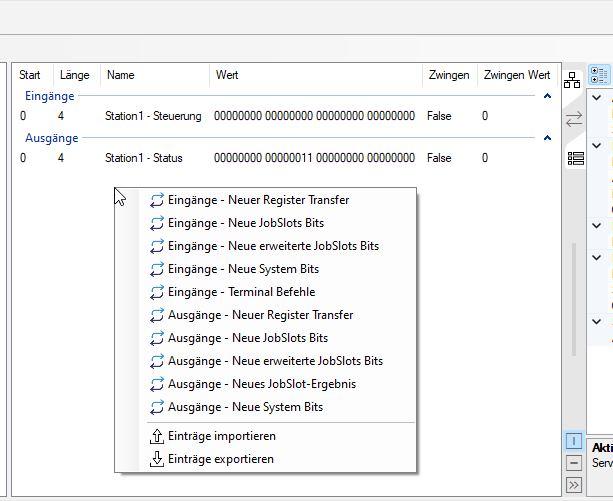
In the centre section of the communication explorer, you can now right-click to add individual fieldbus blocks or edit or delete existing ones.
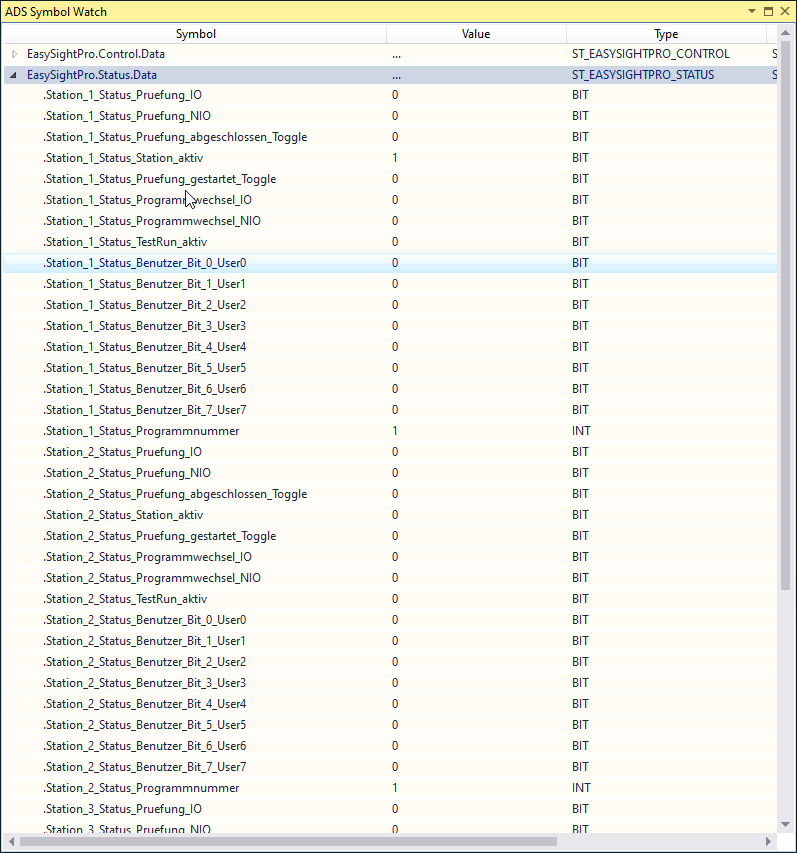
You can access monitoring and status checks via the Administration menu..
Here, the status and values of the inputs and outputs of TwinCAT Ads communication can be monitored..

PLC integration
-
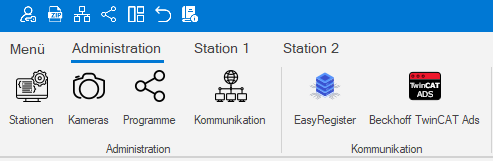
Open the Communication Explorer in EasySightPro. Administration → Communication Explorer
-
Select the “Beckhoff TwinCAT Ads” device
-
Configure the AMS-Net-ID and communication port in the Communication section.
-
Save and restart communication by clicking on “Save.”

-
Reopen the Communication Explorer. Administration → Communication Explorer
-
The ADS client should now be displayed as connected under Status. If this is not the case, check the settings or configuration of the route in TwinCAT.
-
The variable for the camera input and output data can be selected from the drop-down list or entered manually. The drop-down list is only available if communication with the PLC is working.
Important: The variables must be created in TwinCAT as Array[] of Byte. EasySightPro transfers and reads the complete byte array in each cycle.
-
If desired, the EasySightPro data structure can be imported into TwinCAT, thereby automatically creating all variables and signals.
-
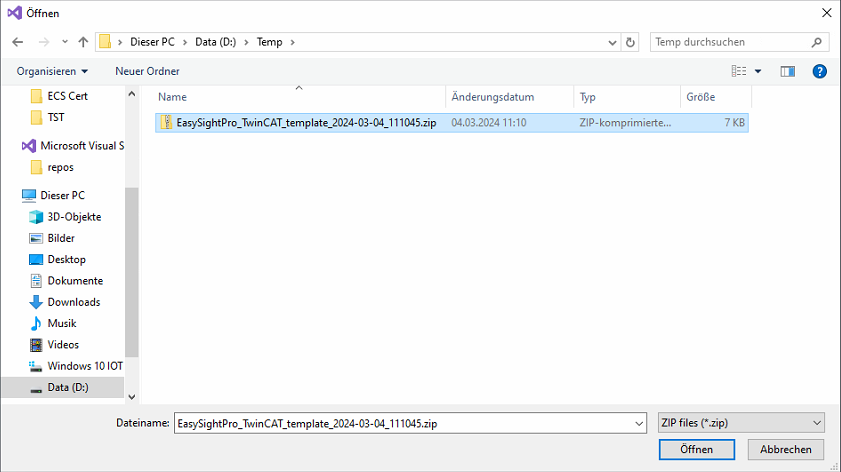
The data structure of the EasySightPro configuration can be saved as a ZIP file in the Communication Explorer using “Export TwinCAT Variable Template.”
-
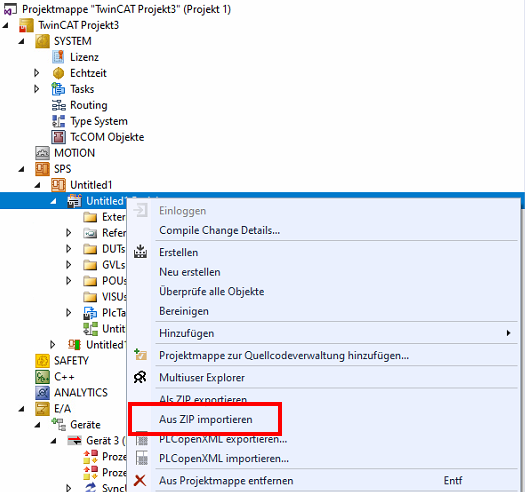
The generated ZIP file can be imported into TwinCAT using “Import from ZIP.”
-
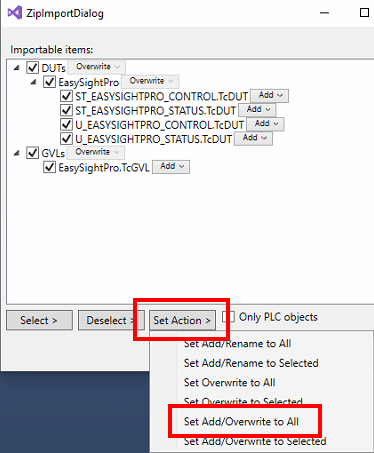
If an imported structure already exists, select “Set Add/Overwrite to All.” Confirm the import by clicking “OK.”
-
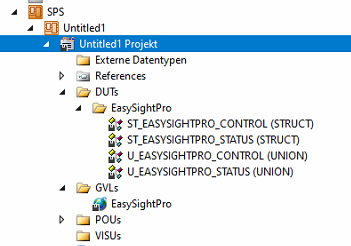
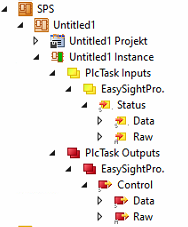
After import, a global variable EasySightPro (GVLs) and the associated data structures are created under DUTs\EasySightPro.
-
Compile the project; this will create the instances.
-
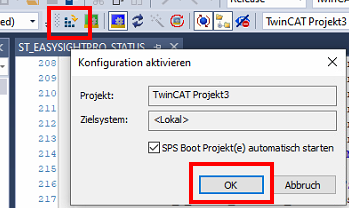
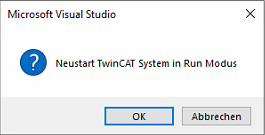
Now the configuration can be activated and TwinCAT can be switched to run mode.
-
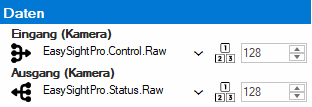
Once the configuration has been activated and the TwinCAT Ads connection has been reestablished (takes 10-15 seconds), the input and output variables can be assigned in the Communication Explorer.
-
The online data can be viewed via EasySightPro.Status.Data or EasySightPro.Control.Data.